GPT Model Configuration
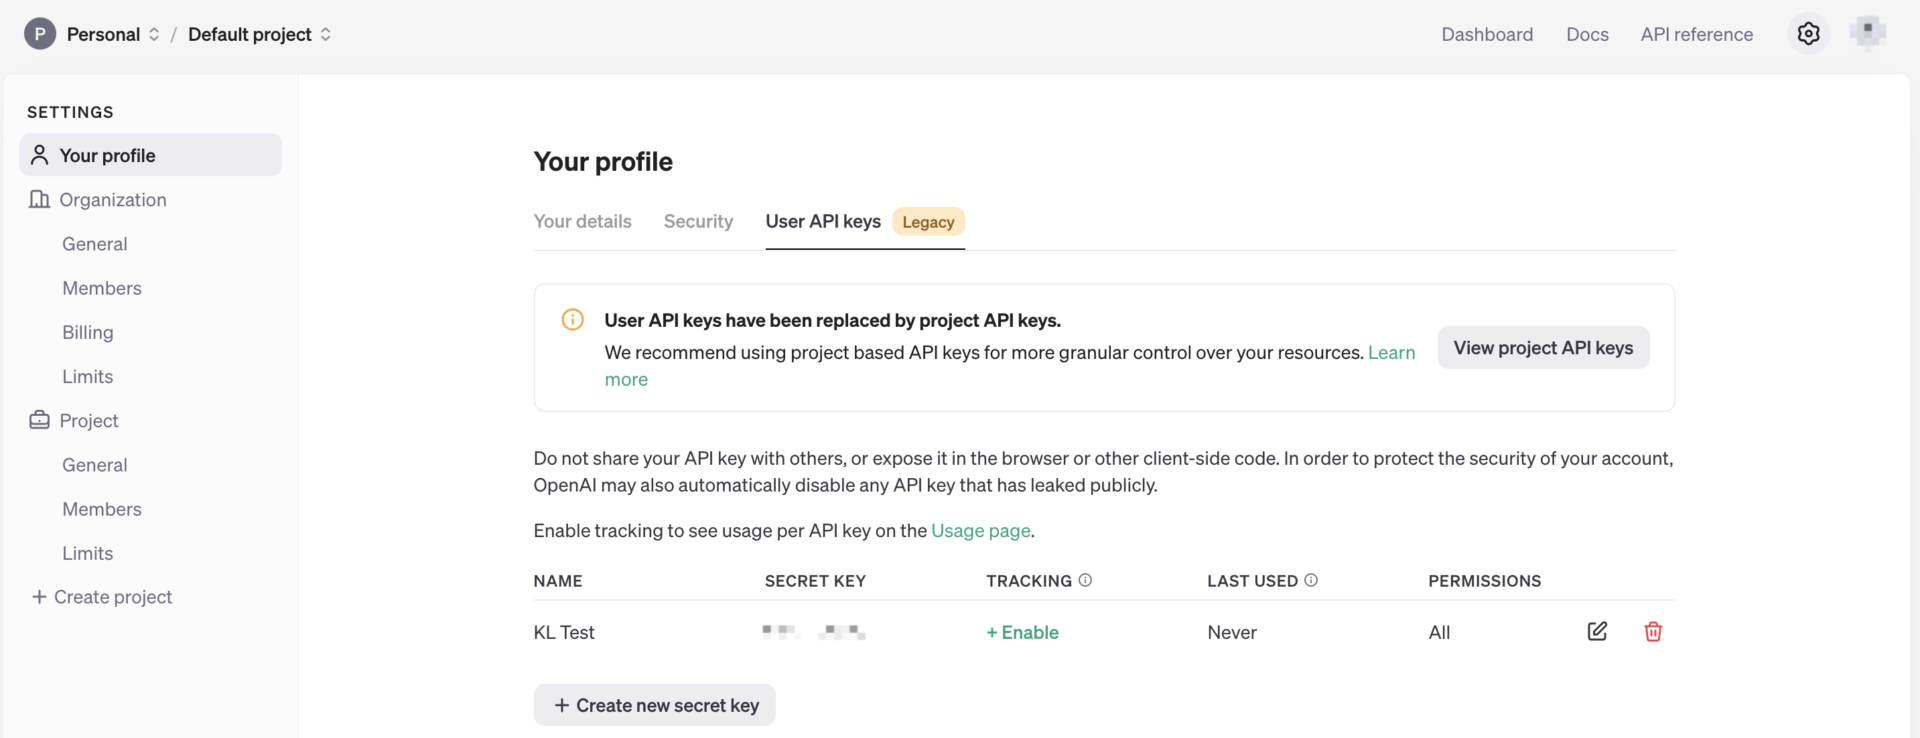
1、 To use the GPT model, you need to get the API Key of OpenAI first.
2、[API Key] Get link: https://platform.openai.com/settings/profile?tab=api-keys
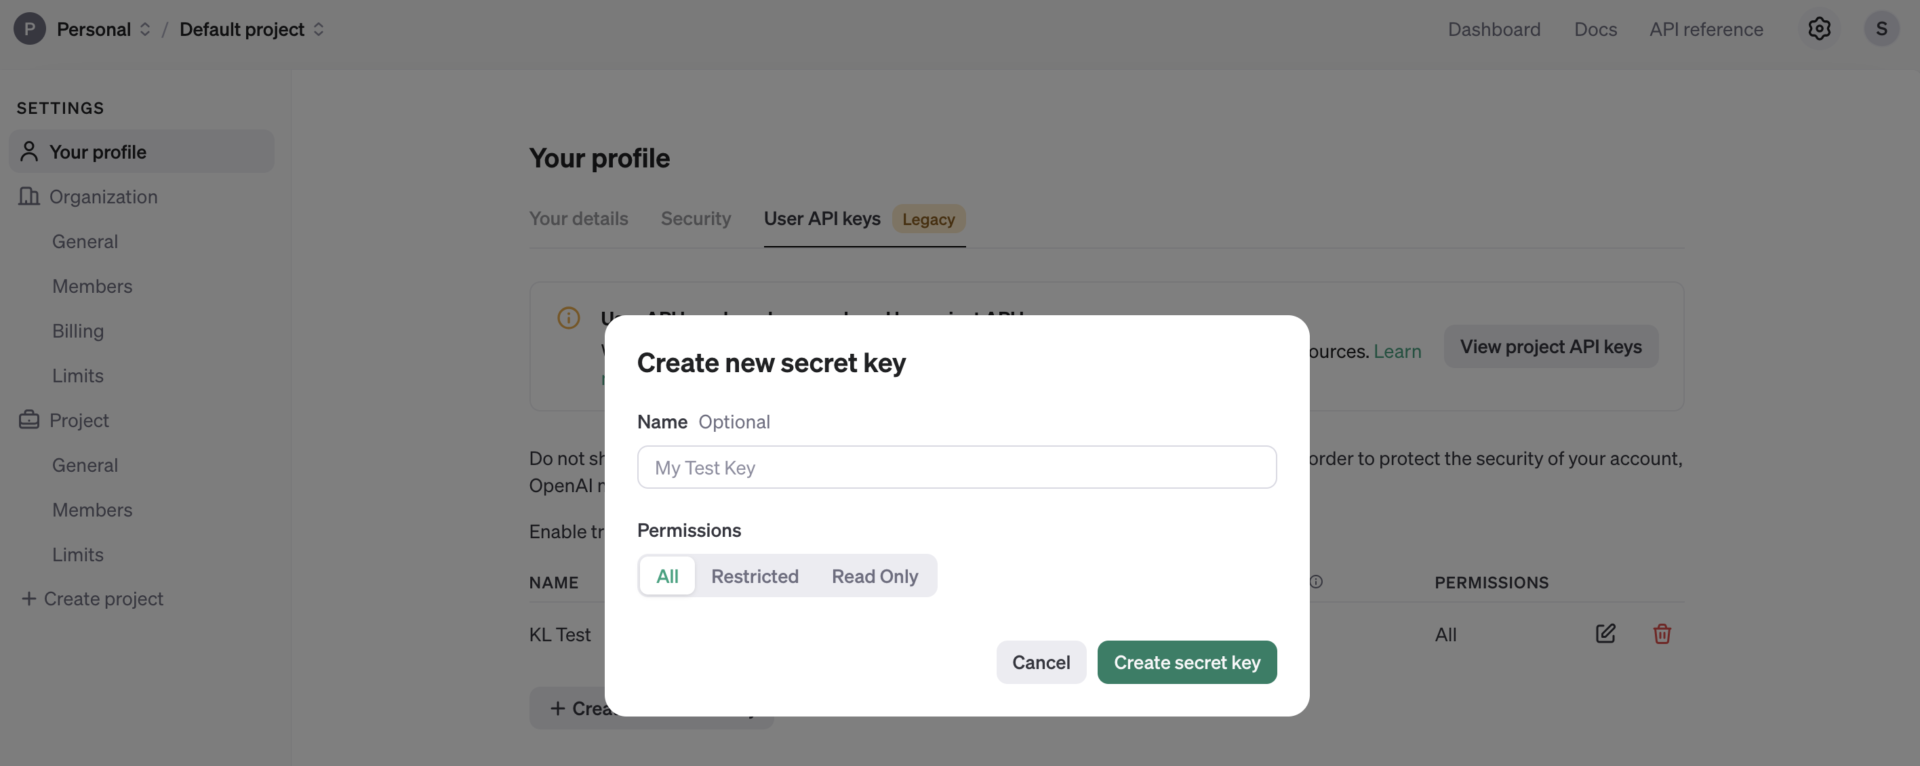
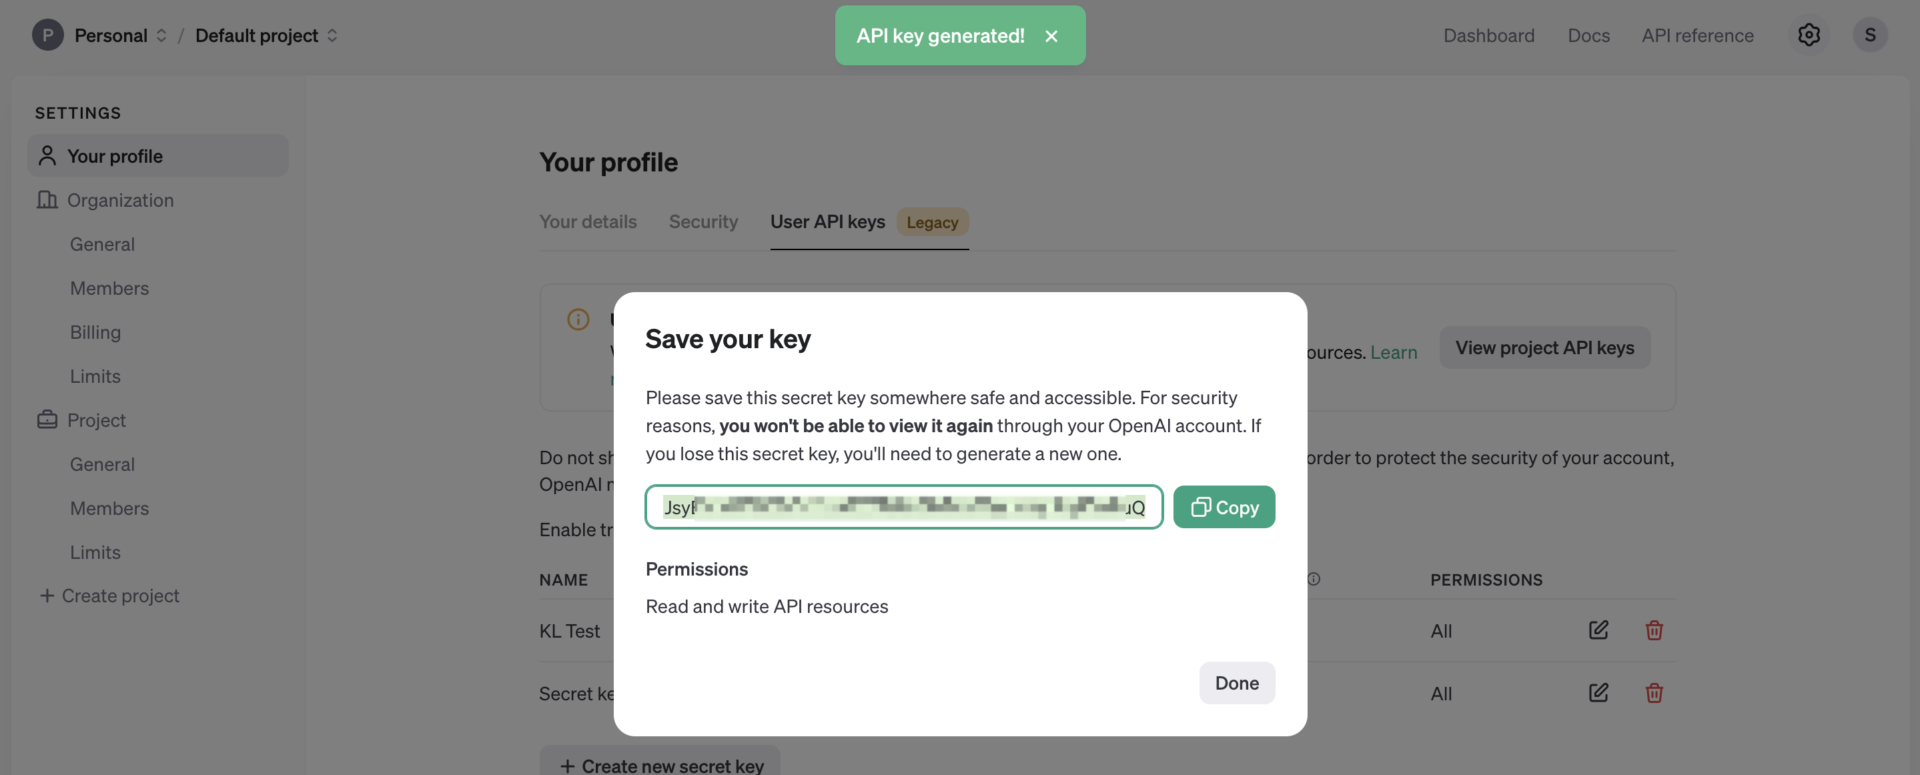
In the following interface, click [Create new secret key] to start creating a new key. After the key is created, copy and save the key.
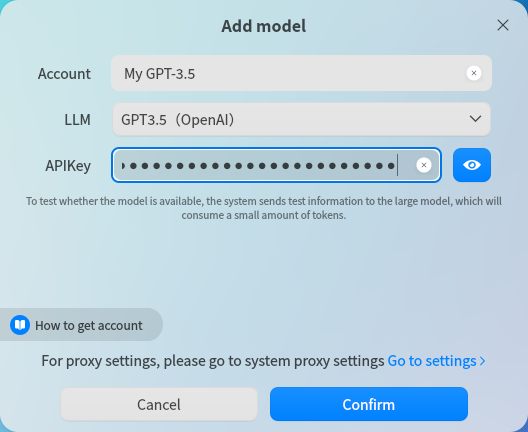
3、 Fill in the UOS AI configuration:
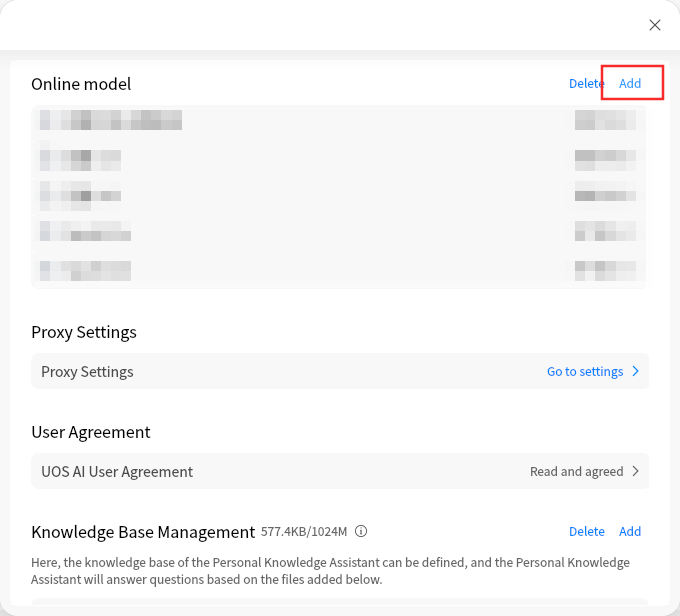
- Open the UOS AI setting page, click [Add], you can checkthe model parameterconfiguration page;
- LLM: In [Model Type], select [GPT 3.5] or [GPT 4.0] ;
- Account: Name your model, which mainly used to distinguish different models.The name will be displayed in the model selection box in the main interface of UOS AI application.
- APIKey: The saved OpenAI Key above.
Customized Model Configuration
Pre-conditions
- Model Interface Requirement: The interface specification of UOS AI's custom model is OpenAI's /v1/chat/completions, so only model services that provide OpenAI-compatible interfaces can be added to UOS AI for use.
- Application version requirement: UOS AI 1.3.0 or above.
Online Model Access
We will introduce the method of adding online models. In this example, we will use Moonshot API.
Moonshot
1、Get API: Open the API description of the Moonshot: https://platform.moonshot.cn/docs/api/chat#api-%E8%AF%B4%E6%98%8E
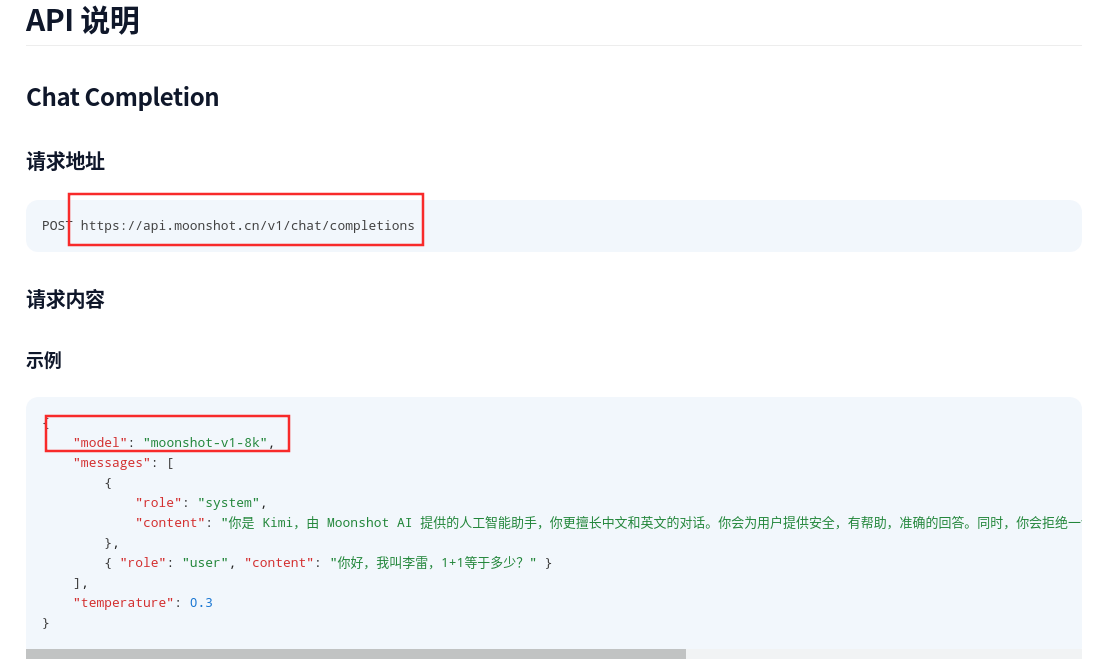
- According to thedocumentabove, the request address is: https://api.moonshot.cn/v1/chat/completions
- Model name: moonshot-v1-8k
2、Get API Key
- Login to the console desk of Moonshot and enter “API Key Management”: https://platform.moonshot.cn/console/api-keys
- Click the “Create” button on the right side to generate API Key, and copy the generated key in this interface.
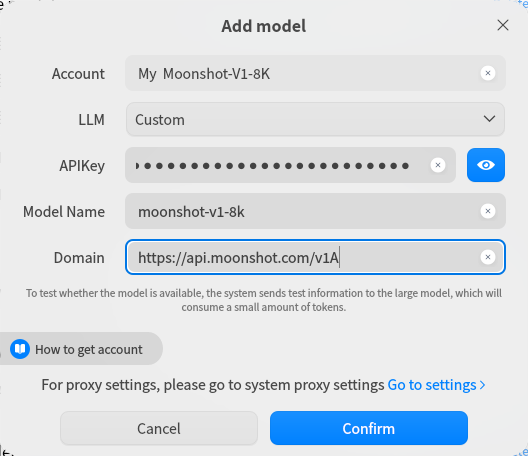
3、Add model in UOS AI.
4、Enter the UOS AI setting interface to add models. Switch to “Custom” in the model option of the model adding interface. Then fill in the following information:
- API Key: Paste the key you copied in the previous step in the API Key field.
- Account Name: Give your model a name, mainly used to distinguish different models, the name will be shown in the model selection box in the main interface of UOS AI application.
- Model name: fill in the model name declared by Moonshot API in step 1: moonshot-v1-8k
- Request address: UOS AI will automatically add/chat/completions to the request address, so the address filled in here needs to remove the/chat/completions from the Moonshot’ address.
- The actual fill in is: https://api.moonshot.cn/v1
- Click Confirm to complete the verification and then you can use it in the dialog window.
5、Other online models compatible with OpenAI API interface can be accessed by the above method. The following is the API description of some big model vendors.
- ZhiPu: https://open.bigmodel.cn/dev/api#glm-4
- Baichuan: https://platform.baichuan-ai.com/docs/api
- Tongyi Qianqian: https://help.aliyun.com/zh/dashscope/developer-reference/compatibility-of-openai-with-dashscope
- LingYiWanWu: https://platform.lingyiwanwu.com/docs#api-%E5%B9%B3%E5%8F%B0
- Deepseek: https://platform.deepseek.com/api-docs/zh-cn/
Local Model Access
Install Ollama
1、Before running the local model, you need to install Ollama, which isalocal deployment tool for open source programming language models, through which you can easily deploy open source large models locally.
2、Ollama repository address: https://github.com/ollama/ollama
3、Follow the tutorial to install the ollama program on your system.
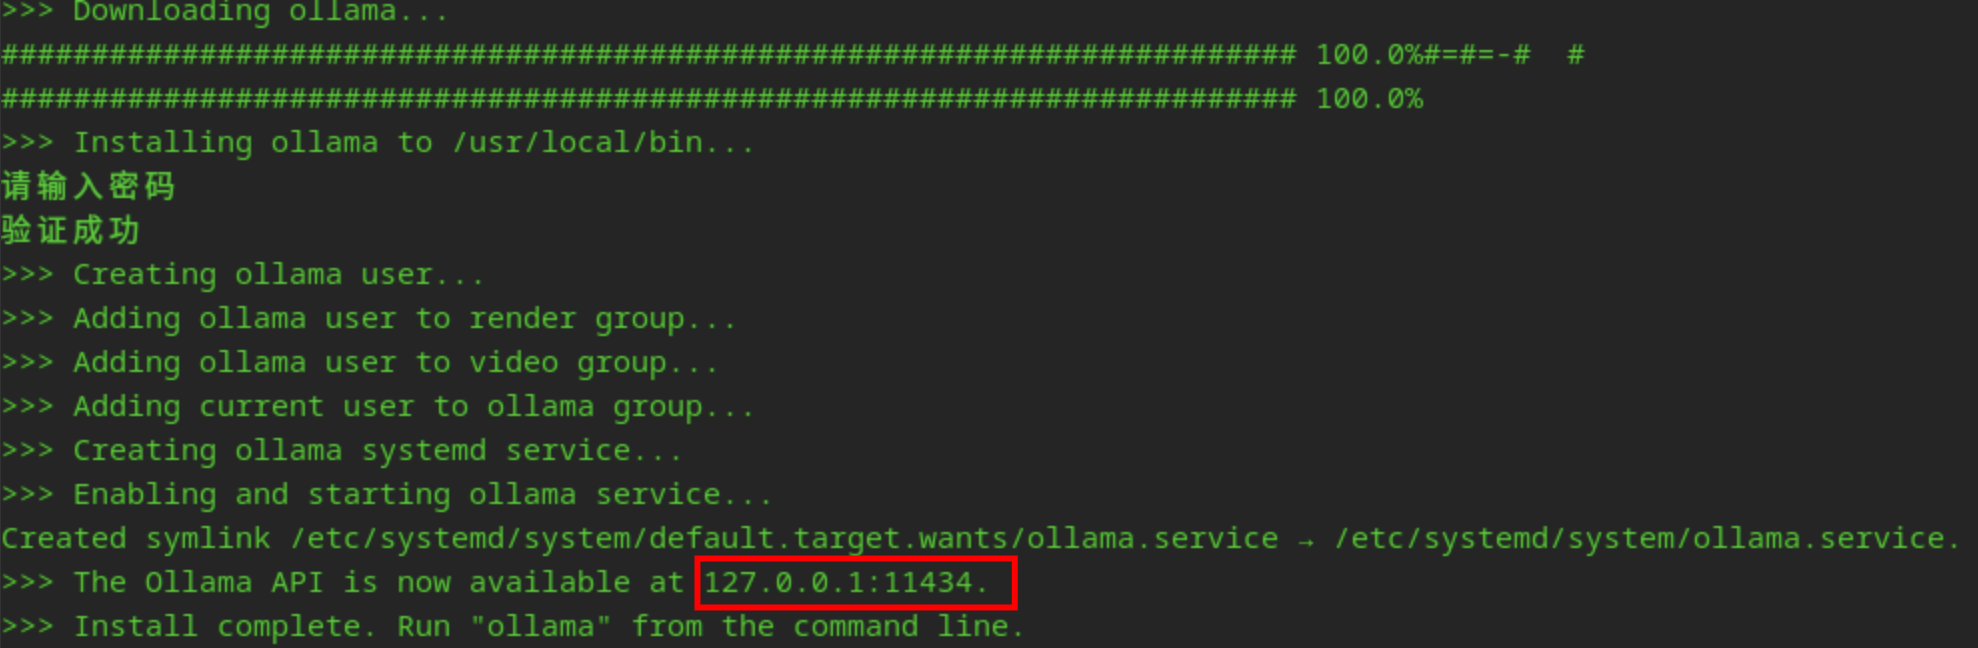
- Execute the following commands to directly install ollama.
- Compile and install, Docker installation please refer to the instructions in Github.
Bash
curl -fsSL https://ollama.com/install.sh | sh
4、Get the service address: 127.0.0.1:11434; subsequent backup.
Run the model
1、After installing Ollama, run the model in the terminal, e.g. Qwen2's 7B model.
Bash
ollama run qwen2:7b
2、The model will be downloaded automatically the first time you run it, and you need to wait for a while according to the network condition.

3、Ollama model repository can be found at https://ollama.com/library, you can choose the model according to your needs.
UOS AI Configuration
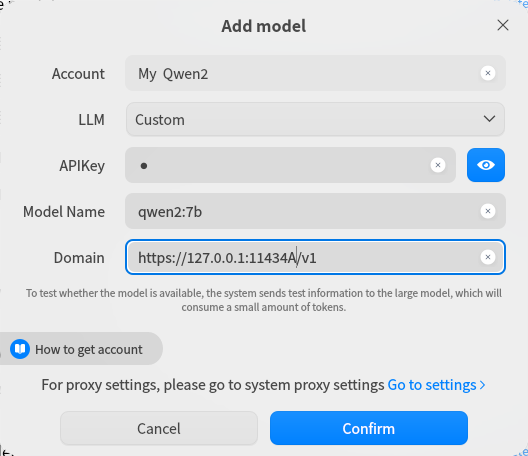
1、 After Ollama starts the model, you can add the model in UOS AI.
2、Enter the model adding interface of UOS AI, and select the model type as Custom.
3、Account name: Name your model which mainly used to distinguish different models. The name will be displayed in the model selection box in the main interface of UOS AI application.
4、APIKey: Ollama has not enabled authentication, you can fill in the name as you like.
5、Model name: fill in the name of the model that Ollama is running, such as qwen2:7b in the previous section, then fill in qwen2:7b here.
6、Model request address:
- Ollama's default service address is 127.0.0.1:11434 and its OpenAI compatible interface is http://127.0.0.1:11434/v1/chat/completions
- Therefore, in UOS AI, you only need to fill in http://127.0.0.1:11434/v1.
7、After finishing adding, you can talk with local models in UOS AI.
Appendix:
(1)deepin All Versions(include deepin V15)
(2)UOS Al Revolutionizes into Next-Level Intelligence.
Content source: deepin community
Reprinted with attribution