.png)
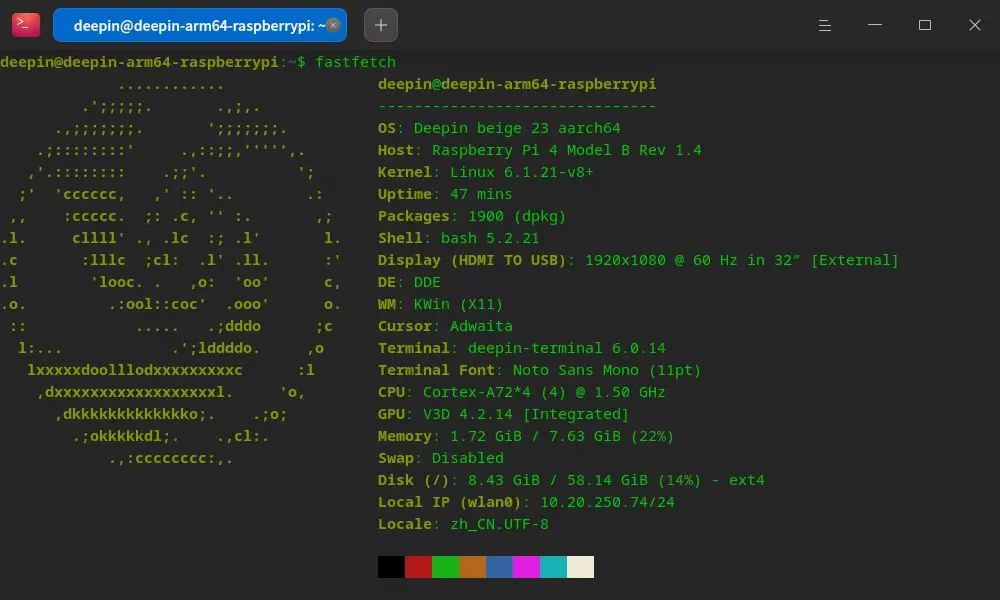
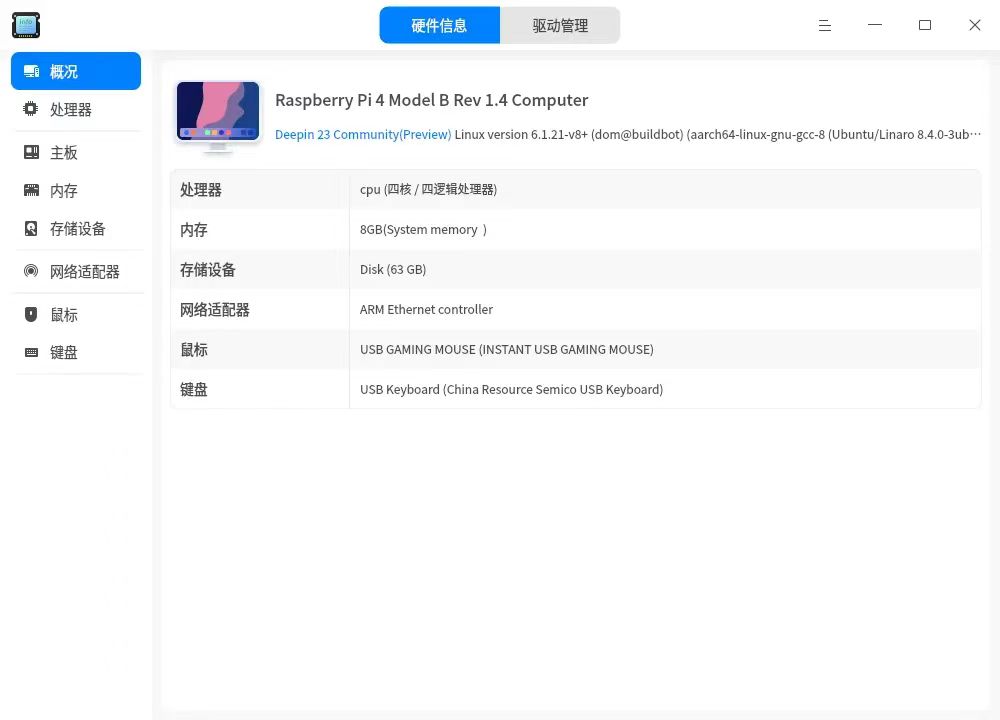
Previously, we received a message from a user who wanted to run deepin 23 on their Raspberry Pi. Recently, the deepin community's deepin-raspberrypi SIG internally released a preview version of deepin 23 for Raspberry Pi. Let's take a look at the performance of this card computer running deepin 23 together. (Devices tested: Raspberry Pi 4B, Raspberry Pi 5B, theoretically compatible with other models, feel free to try!)
Building the Kernel
The kernel can be copied from the boot directory of the official repository: https://github.com/raspberrypi/firmware
Install the necessary tools, choosing cross-compilation for a 64-bit toolchain.
sudo apt install git bc bison flex libssl-dev make libc6-dev libncurses5-dev
Clone the code:
git clone --depth=1 https://github.com/raspberrypi/linux
Run the following commands to prepare the default configuration based on the Raspberry Pi model. Here, we take Raspberry Pi 4B and 5B as examples.
1.1 Raspberry Pi 4B
cd linux
KERNEL=kernel8
make ARCH=arm64 CROSS_COMPILE=aarch64-linux-gnu- bcm2711_defconfig
1.2 Raspberry Pi 5B
cd linux
KERNEL=kernel_2712
make ARCH=arm64 CROSS_COMPILE=aarch64-linux-gnu- bcm2712_defconfig
Build using the configuration. For all 64-bit versions:
make -j$(nproc) ARCH=arm64 CROSS_COMPILE=aarch64-linux-gnu- Image dtbs modules
For more information, please refer to: https://www.raspberrypi.com/documentation/computers/linux_kernel.html
Creating the Disk Image
dd if=/dev/zero of=deepin-raspberrypi.img bs=1M count=2G
(echo n; echo 1; echo ""; echo +300M; echo ef00; \
echo c; echo boot; \
echo n; echo 2; echo ""; echo ""; echo ""; \
echo c; echo 2; echo rootfs; \
echo w; echo y) | gdisk deepin-raspberrypi.img
Mounting:
LOOP=$(sudo losetup --partscan --find --show deepin-raspberrypi.img)
sudo mkfs.fat -F32 "${LOOP}p1"
sudo mkfs.ext4 "${LOOP}p2"
mkdir /mnt/rootfs
ROOTFS="/mnt/rootfs"
sudo mount "${LOOP}p2" $ROOTFS
git clone https://github.com/chenchongbiao/deepin-raspberrypi.git
cd deepin-raspberrypi
# Build the root file system
./build-rootfs.sh
sudo mount "${LOOP}p1" $ROOTFS/boot
# For physical devices, add cmdline.txt to define Linux kernel command-line parameters during startup
PTUUID=$(sudo blkid /dev/loop0 | awk -F'PTUUID="' '{print $2}' | awk -F'"' '{print $1}')
echo "console=serial0,115200 console=tty1 root=PARTUUID=$PTUUID-02 rootfstype=ext4 elevator=deadline fsck.repair=yes rootwait quiet init=/usr/lib/raspi-config/init_resize.sh" | sudo tee $ROOTFS/boot/cmdline.txt
# Copy boot loader/GPU firmware, etc. from the official repository at https://github.com/raspberrypi/firmware/tree/master/boot, and add cmdline.txt and config.txt configurations
sudo cp -r firmware/* $ROOTFS/boot
# Raspberry Pi's official system configuration tool
sudo mount --bind /dev $ROOTFS/dev
sudo mount -t proc chproc $ROOTFS/proc
sudo mount -t sysfs chsys $ROOTFS/sys
sudo mount -t tmpfs -o "size=99%" tmpfs $ROOTFS/tmp
sudo mount -t tmpfs -o "size=99%" tmpfs $ROOTFS/var/tmp
# Install raspi-config for Raspberry Pi
sudo chroot $ROOTFS /usr/bin/env bash -e -o pipefail -c "curl http://archive.raspberrypi.org/debian/pool/main/r/raspi-config/raspi-config_20240313_all.deb -o /tmp/raspi-config.deb"
sudo chroot $ROOTFS /usr/bin/env bash -e -o pipefail -c "apt update -y && apt install -y /tmp/raspi-config.deb"
sudo chroot $ROOTFS /usr/bin/env bash -e -o pipefail -c "rm /tmp/raspi-config.deb"
PTUUID=$(sudo blkid $LOOP | awk -F'PTUUID="' '{print $2}' | awk -F'"' '{print $1}')
sudo tee $ROOTFS/etc/fstab << EOF
proc /proc proc defaults 0 0
PARTUUID=$PTUUID-01 /boot vfat defaults 0 2
PARTUUID=$PTUUID-02 / ext4 defaults,noatime 0 1
EOF
Unmount the disk:
sudo umount -l $ROOTFS
sudo losetup -D $LOOP
Automation Scripts
git clone https://github.com/deepin-community/deepin-raspberrypi.git
cd deepin-raspberrypi
./build.sh
This builds the minimal system.
The default account and password are both "deepin".
It is recommended to use the official Raspberry Pi burning tool.
Expansion
sudo e2fsck -f /dev/sda2sudo resize2fs /dev/sda2
Modify "sda" based on the actual device shown after inserting the TF card. You can check using the command "lsblk".
Installing the Desktop
export DEBIAN_FRONTEND=noninteractive
sudo apt update
sudo apt install deepin-desktop-environment-base \
deepin-desktop-environment-cli \
deepin-desktop-environment-core \
deepin-desktop-environment-extras
After installation, restart.
Installing Applications
It is recommended to directly download corresponding application installation packages from the official website or GitHub.
sudo apt install firefox
6.2 Installing UOS AI
sudo apt update
sudo apt install uos-ai
A restart may be required to see the UOS AI plugin in the dock. Click on the UOS AI icon to open the interface and click on "No Account" to receive a free account.
The plugin needs to be installed.
sudo apt update
sudo apt install deepin-fcitx5configtool-plugin
After installation, go to Control Center => Keyboard and Language => Input Method to configure.
七、效果图


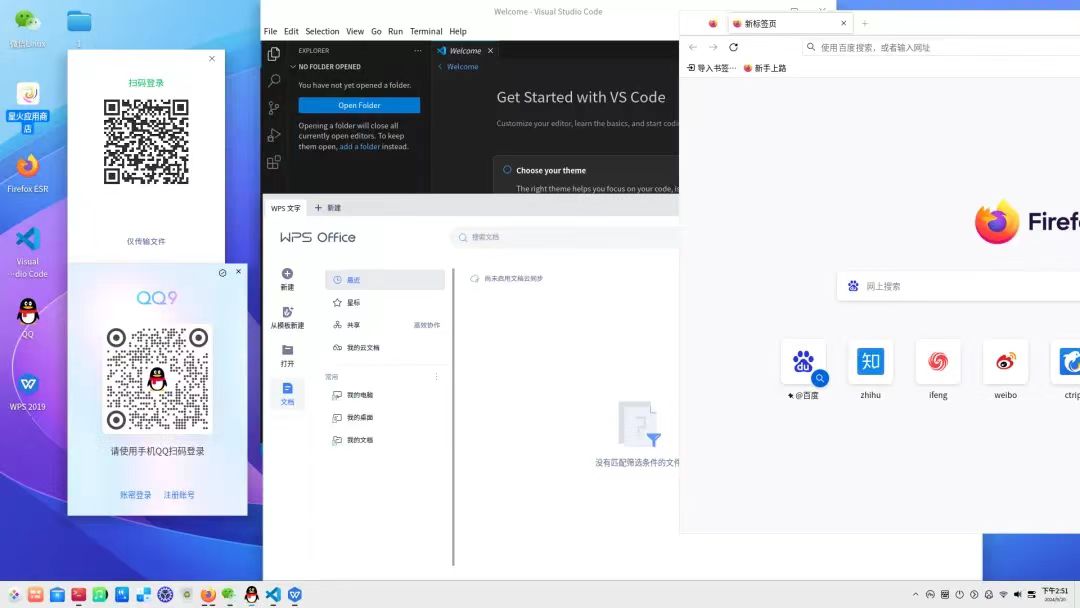
Native applications like QQ, WeChat, and WPS can be used.
Mirror Download
Mirror download link:https://www.123pan.com/s/kzYMjv-UCmVH
Extraction code: OiFA
After further optimization, the image will be submitted to the official deepin website. Stay tuned.
Thanks to the sig-deepin-raspberrypi member @空木蓮華 for providing the content. Everyone is welcome to join the SIG group and provide feedback at https://github.com/deepin-community/deepin-raspberrypi.
Related Reading:
(1)deepin Full Version Image Downloads (including deepin V15)
(2)deepin en Español Community
Content source: deepin community
Reprinted with attribution